ARML Projector Configuration Guide
The projector in the ARML is the EKB Technologies E4500MKIIRGBHP-OXF DLP development module. It works "out of the box" by connecting it to a video source via the mini-HDMI port. We have customized the firmware by adding the ARML logo to the splash screen.
Loading the custom firmware
- On a Windows machine, download and unzip the firmware management tool archive, which includes the custom image.
- Run the "LightCrafter4500.exe" file from the
E4500MKII\GUIdirectory. - Connect the projector to the computer using a USB cable (the port on the projector is micro-USB).
- Select the "Image/Firmware" tab, and then the "Firmware Upload" sub-tab.
- In the "Firmware File" input, choose the "DLPR4500_v3.0.0-EKB-ARML.bin" firmware file from the
E4500MKII\Firmwaredirectory. - Click "Upload".
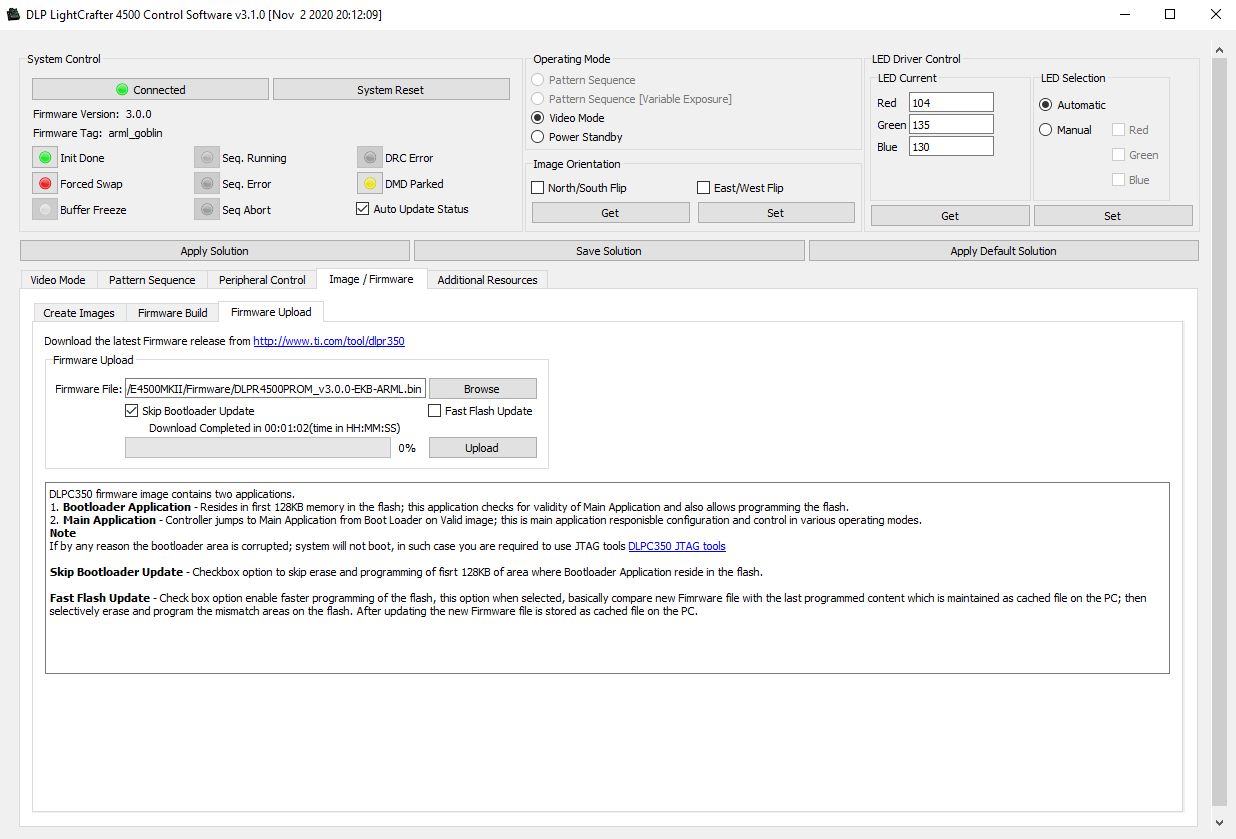 Figure 1: Screenshot of the projector firmware management tool in the upload firmware mode.
Customizing the splash screen
- Follow step 1 and 2 above to run the firmware management tool.
- Select the "Image/Firmware" tab and then "Firmware Build" sub-tab.
- In the “Firmware File” input, choose the "DLPR4500_v3.0.0-EKB-ARML.bin" firmware file from the
E4500MKII\Firmwaredirectory. - In the “Add Firmware Tag” input, give your firmware a name (e.g. "arml_custom").
- Click the "Change" button and select the desired image. It must have a resolution of 912x1140 and saved in a 24Bit bitmap file format. For an example, download the ARML logo bitmap file.
- Click “Save Updates” and save the new firmware file. Make sure to end its name with a .bin suffix (the GUI does not add the file extension automatically).
- Follow steps 3-6 above, but choose the file you just saved in step 5.
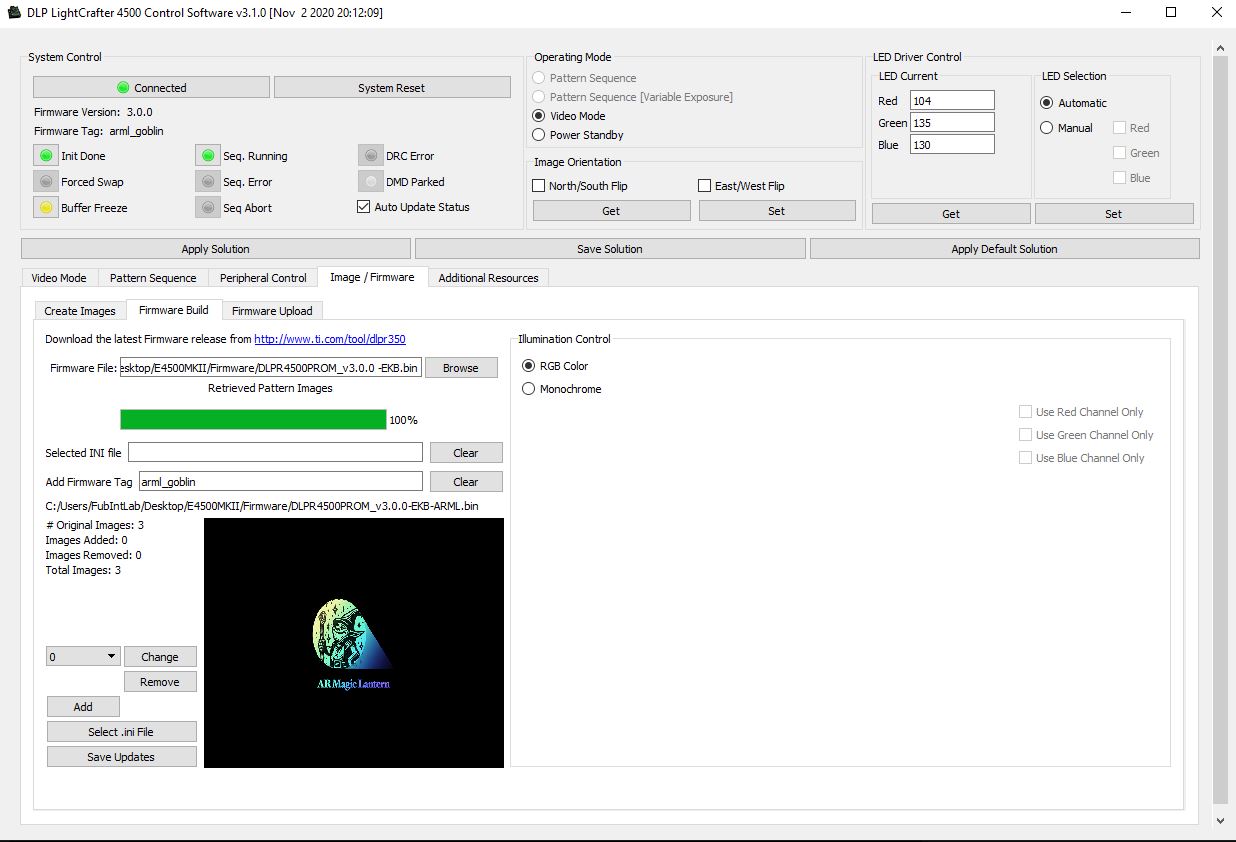 Figure 2: Screenshot of the projector firmware management tool in the build firmware mode.